Poppies, hearts and flowers

Hi, everyone! Poppies, hearts and flowers make the third part of the bookmarks series.

For these three bookmarks, I went with pink and white thick card. Avery Elle die was the one used to die-cut the bookmarks. Then, I went on stamping the poppies on two of the die-cuts, using Memento Tuxedo Black. On the third one, I stamped Avery Elle’s heart balloon, ‘smile’ sentiment and added some more handwritten words.
Red and lilac twine was added to the bookmarks to give contrast and dimension. The stamps were coloured in using Promarkers and Stabilo fineliners. Handwriting was done with Stabilo fineliners.

IMG8488xi IMG8482xi


Hope you like these too! I’ll be back soon with a new part of the bookmarks series and with some more projects.
Wishing you all the best,
Talida

Photo credits: Cristian Istrate 

Recycled Kraft Bookmarks

IMG8505xi IMG8506xiHi, everyone!
Today, I have the second part of the recent bookmarks series. The ones today are using a mix of stamps, brands and a bit of handwriting too.
I have used the bookmarks dies from Avery Elle to die cut out of recycled kraft card in white and brown/natural. Lately, I’ve become a huge fan of this type of card not only for its quality but also for keeping it green.

To embellish them I used some of Avery Elle’s Ellie stamp set – the heart balloon, the tiny flower, the grass and the sentiment ‘smile’. For one of these bookmarks I chose a Gorjuss girl from the mini collectible stamp series – ‘I gave you my heart’, to whom I added a mouth and a nose with a Stabilo fineliner in black. Docrafts Papermania poppy rubber stamp made a perfect fit for another one of the bookmarks. And for the last one in this second part, I went on with stamping the heart balloon and just added some handwritten sentiments.
Colouring was done using Promarkers and for the handwriting I used my Stabilo fineliners. I have also added red twine and some natural hemp twine.
The bookmarks turned out really great and I love it!

Photo credits go to Cristian Istrate.

Wishing you all the best,
Talida


Let’s celebrate

Dear crafty friends, good morning! Let’s celebrate a new day, life and enjoy living it in the present, the best we can!
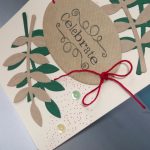
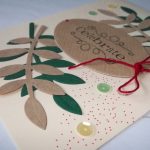
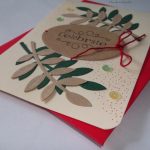
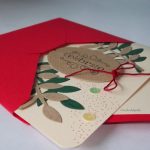
The card I’ll show you today is part of another 5 card set I made and gave to a beyond great person. What made me happy and all teary was the reaction of joy and eagerness to open the envelope box to see what’s inside. It literally filled my eyes with tears!

IMG8328

IMG8332

IMG8336

IMG8333

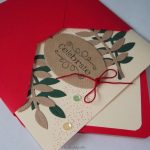
Back to the card, I used cream cardstock for the card base and rounded the bottom corners using my 1-2-3 Punch Board. Then, I die-cut some leaves out of kraft and green cardstock – 2 of each. In my stash, there are many other die cut pieces like the one I used for this card’s centre. This is a kraft card oval frame, die cut using WPlus9′ s Anastasia Tag dies. I stamped ‘celebrate’ as a sentiment onto it using Tsukineko’s Brilliance fast-drying pigment ink in Graphite Black. Next step was to adhere the leaves onto the front card base. In order to give more dimension, I pierced the centre frame on the sides, thread some red twine and tied it in a bow on the right.

IMG8345

IMG8337

IMG8339After that, I chose some sequins from Neat&Tangled Spring Mix set (bought from Seven Hills Crafts), 2 of each colour. It looked a bit incomplete, so, I thought adding some tiny dots with my Stabilo fineliner in red would do the trick. And that was all. My card was ready.

Wishing you a lovely day and sending you big hugs,
Talida

Dancing Penguin Shaker

Hi everyone!

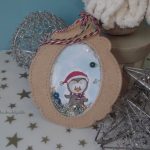
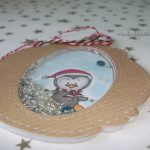
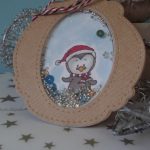
Today, I have a shaker decoration to show you. I also call it a Dancing Penguin Shaker Ornament.
It looks pretty simple, but I can tell you it takes quite some time to make it ready to be added on your tree as a decoration. Let’s say that I worked an entire morning just to create it. Shakers have an awesome effect especially for children. And this one was a gift I made for my lovely niece Antonia.

To create the shaker I die-cut 3 times the WPlus9 Anastasia Tag out of thick kraft cardstock. I ran two of them through my XCut machine and die-cut the shaker window using the oval frames that come with the tag. I have also die-cut a piece of acetate and a double -sided foam adhesive with the same tag die. I adhered the foam adhesive to one of the tags with a window frame and ran through the die-cut machine to make a window in the foam adhesive pad too. It’s been quite a challenge to make it to the end!

IMG7934 IMG7930 IMG7939 IMG7935

Read more

My first calendars and their story

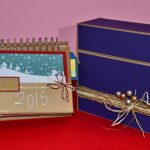
It all started with a wish. 2013’s wish, when I went online, full speed, with the project HandmadebyTalida. There was little time to make the calendars happen then, so last year I planned to craft and give them as presents to a few dear ones that matter a lot! Then, I can’t remember how it happened but I had a huge request for the calendars and ended up in making so many more than planned. I am so grateful to all of you who asked me to create new ones. You can’t imagine how much! Thank you.

IMG1711xi IMG1687xi IMG1694xi IMG1728xi

There was a clear idea that I kept in mind for each calendar’s month, a set of colours and themes.  Read more

My Kind of Trees

Hello dear friends and fans,

Whether you were naughty or nice, hope Santa brought you all lots of cheer and presents under your Christmas trees, that your spirits are bright and all of you enjoyed this time with family and dear ones!

There were a lot of cards made for these holidays and I feel so grateful to those who chose me to craft them for. As expected, I haven’t had the chance to share all of them with you, so, I put some more together to present.

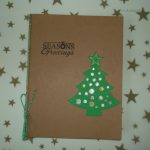
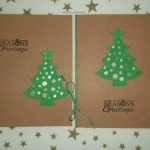
For today, I have some cards with trees. These are some die-cut trees, decorated with sequins from my mum’s stash, some tiny buttons and stars and others simply embellished with my glitter gel pens and star stamp for the top. Sentiments, ribbons and twine were added for the dimension.

IMG7543 IMG7545 IMG7573 IMG7575

Many thanks for your comments and see you later with a post about Christmas stockings.
Talida

Sharing kindness

Hello, everyone!

This post is about sharing kindness and saying thank you in a crafty way. I’ve been pretty busy lately trying to finish my Christmas crafts and projects. The one today is part of this and my part in the art & craft #sharehandmadekindness campaign inspired and launched by Jennifer McGuire. She is a very talented craft maker whose work I admire very much. As I haven’t got the kindness stamp set yet, I went on and used some of my recently acquired stamps.

Some of them are digital stamps created by Gerda Steiner and I must tell you that I adore them.

IMGXmas2015_2 IMGXmas2015_1 IMGXmas2015_4 IMGXmas2015_3 IMGXmas2015_7 IMGXmas2015_8

Read more

Mărțișoare

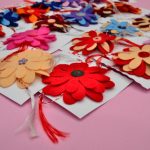
DSC_1913 DSC_1916 DSC_1926 DSC_1924 DSC_1922 DSC_1919March 1st and the first signs of a longed-for spring are so welcome to our hearts and souls! Colourful flowers made of felt and sewn with buttons were designed to be given this year as my handmade m?r?i?oare.

Wish you all a happy, sunny and lovely spring!

Talida 🙂

Bookster. Oscar. Read’n’Roll

Today’s post is less about the card I made, more about reading and one of the greatest libraries I know of.

Why a card for Bookster ? To express our gratitude for the joy and positiveness they brought into our lives. An experience that definitely changed our lives. What is Bookster ? A whole world of books, articles and case studies run by great people doing what they love most!

A while ago, I had little time for either reading or creating anything but work, work, work. Then, I made a change and here I am: happy, creative and inspired!

I heard about them in late November 2013, when my husband came home very enthusiastic about this new thing at work: there is a library that brings the books you choose to read directly at your office! To tell the truth, I shared little enthusiasm then. We were used to buying our books and the idea did not find its way to us right away.

And there it was: the change. Everyone was talking about the most wanted and most read book at his office: “Oscar and the Lady in Pink” by Éric-Emmanuel Schmitt . He signed up on the waiting list. When did it arrive? At the right time. And it hit not only close to home, but home! Or at least, that was one of the possibilities. It made waiting for the biopsy results feel less frightening and more positive. The book itself is a sad story told in a very positive way, changing your perspective towards what really matters in life. Once you started reading it, you couldn’t let it down. That’s what we like about it!

From then on, the thrill and the great experience have started and we both, my husband and I, enjoy to Read’n’Roll’n’Love’n’Share with Bookster!

‘Many opportunities you have in your life are generated by the energy you create around.’ Sir Ken Robinson

Here’s the card I made. And yes, it includes in it, as all the cards I make do, a part of my heart and soul!

IMG7025 IMG7034 IMG7036 IMG7039


Jill’s Crafty Challenge, February 3rd – A Valentine’s Shaker Card

Hi everyone!

Challenges are always more than welcome as they put my creativity and mind at work. So, thanks a lot Jill for your crafty challenges and sketches.

This time it was about a photo with multicoloured hearts, you can see it here.

My first idea was to use an embossing folder and colour in the hearts with brush pens. Then I thought it would be to simple and I went on making my first shaker card. As a first attempt to this type, I can say I am happy with the result. Next one should definitely be better as I won’t fill the shaker that much. 🙂 I have to admit I went a bit crazy with so many hearts and thought I should add them all.

So, here is the card in details. Hope you all like it!

IMG6899 IMG6898 IMG6896 IMG6895 IMG6894 IMG6893 IMG6900 IMG6890


As always, your comments and appreciation are welcome and well received. All the best to you all!

“I do.” Collection. The Beginnings

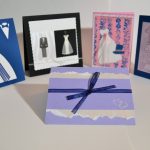
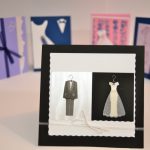
This is the first article about the collection of wedding cards and gifts. It started with lots of ideas and thrill as one of my friends was planning her marriage. We exchanged some ideas, we set the colour range and off I went putting them all to good work.

DSC_5398 DSC_5395 DSC_5397 DSC_5394


I made more than one sample. I wanted her and her husband to be to have a good wide range where to choose from.

In a future post, I will show you the one they chose, the colour range and the gift I gave them on their wedding day (all in matching colours).

DSC_5400


Hope you’ll enjoy them. And please feel free to add your comments with favourites, likes and why not: suggestions.