Hello, everyone! The post today is about celebrating Women’s Day. As a yearly habit I made some cards for Gabi, my beloved husband, to give on this great occasion.
So, I thought about the theme in advance as I wanted to have beautiful spring flowers. The best and most beautiful flower stamps and dies sets I recently acquired (well, here, there is a real debate with Gabi and sometimes with myself on how recent these are :-)) are Fresh Freesia from @Altenewllc. I bought them from Tara and Rick’s great online store. A store that I love and I cannot thank Keren enough for recommending it to me.
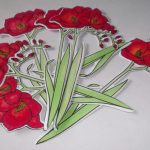
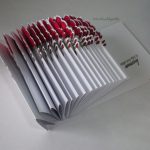
Now, back to the cards, I stamped 60 freesias onto thick white card and started colouring them. Once I got by the 2oth, I realised that my idea of having 3 freesias on a front cover would be too much and would take like forever trying to finish them on time. So, I had a bit over 20 freesias ready coloured with my Promarkers and went on die-cutting them using the coordinating die. Oh, my, how I loved seeing them die-cut! Awesomeness overload!
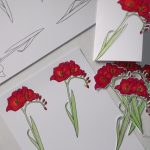


Then, I had an idea already in my mind on how to have them attached to the front cover of the card. But somehow…it looked not right. So…I chose to fold the front side of the card in 2 and then I adhered the freesia. It chose not to adhere it entirely, so I could create a bit of an overlay in order to create dimension. For the sentiment, I Asked Gabi what would he like to say and he chose ‘hope your day is amazing‘.


 Well, as the project took around 3 days, I took a lot of pictures. And when I say a lot, you can definitely think over 100. 🙂
 I know, a bit obsessed. But, I loved so much what I came up with! Gabi has been really kind to help me choose only 10 pictures. Thank you, love!
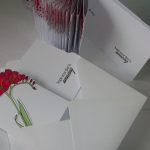
Oh, I was almost going to forget to mention that I made all the envelopes using my 1-2-3 Punch Board from We R Memory Keepers. This is an incredible tool! An I’ve made tons of envelopes and mini boxes so far!And I look forward to making more!
Hope you like my cards, many thanks for stopping by and look forward to being back here real soon,
Talida
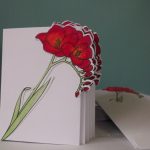
 The idea of pastel colouring came once with the newly added Promarkers to my stash. When finished adding the colours to the freesia, which was die cut in advance using the coordinating die, I brushed some clear Wink of Stella to give it a bit of sparkle. The card I used for the base is in cream colour. I wanted to a different layout for the front cover, so I scored it at about 1/3 from the margin and created a fold. To keep it simple, but with a bit of dimension. I added some twine and gold string to the fold, then tied them into a beautiful bow towards the bottom of the card. After that I adhered the freesia and the card was ready. Read more


