Hello, everyone! Freesia in pastel colours is the card I’d like to show you today.
It looks like I fell in love with this Altenew Fresh Freesia stamp and die set. Altenew has celebrated its 2nd anniversary these days. So, I’d like to wish them many more to come! And hope they’re going to keep growing and making lovely and quality products.
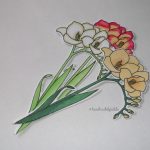
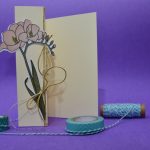 The idea of pastel colouring came once with the newly added Promarkers to my stash. When finished adding the colours to the freesia, which was die cut in advance using the coordinating die, I brushed some clear Wink of Stella to give it a bit of sparkle. The card I used for the base is in cream colour. I wanted to a different layout for the front cover, so I scored it at about 1/3 from the margin and created a fold. To keep it simple, but with a bit of dimension. I added some twine and gold string to the fold, then tied them into a beautiful bow towards the bottom of the card. After that I adhered the freesia and the card was ready. Read more
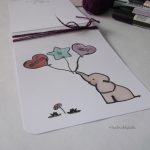
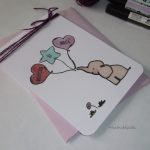
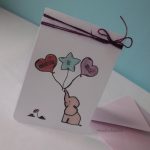
Ellie’s Balloons
Hi, everyone! I have a birthday card to show you today. It’s called Ellie’s balloons.
The stamps I used are part of Avery Elle stamp set ‘Ellie’. The balloons come in two different shapes and for this card I went with both of them. For stamping I used Memento Tuxedo Black and I think I was a bit too hasty and I smudged a bit one balloon string.
Interactive Balloons Birthday Card
Hi, everyone!Interactive balloons?!Oh,yes! Definitely, yes! Why did it take me so long to try and make an interactive card? No idea. It is so much fun and gives so much joy one could not imagine.
So, the birthday card was made for my dear cousin, friend and great photographer. If you’ve been on this page before, you surely saw his amazing photos.
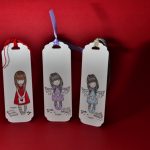
Gorjuss Bookmarks
Hello, again!The fourth part of the bookmarks series is based on Gorjuss girls. Oh, how I love them!
The stamps I used are the new ones, the collectibles. They come in mini sizes and are easy to fit on bookmarks too. Gorjuss has been my favourite when it comes to stamping and creating for my dear ones. And since my niece suggested she needs a mouth and a nose, I’ve kept adding them to the original design. The mini stamps chosen for these bookmarks are called ‘I gave you my heart’ and ‘I found my family in a book’. Aren’t they ‘gorjuss’?
For colouring in, I used Promarkers again. And lately, I’ve enjoyed trying new colouring techniques such as layering. You can see that by looking at Gorjuss’s hair. I’m not perfect at this but I’ve been working on it! 😉 Each bookmark has attached either a red twine, lilac ribbon or a multicoloured string. No sentiments or handwriting were added as I wanted to keep the bookmarks as clean and simple as possible.

Of all the beautiful photos, Cristian Istrate took, I kept a few of them. Couldn’t stop under 5. Such hard decision has it been!
Hope you like them. Many thanks for stopping by and for your lovely comments.
Wishing you a lovely day,
Talida
Poppies, hearts and flowers
Hi, everyone! Poppies, hearts and flowers make the third part of the bookmarks series.
For these three bookmarks, I went with pink and white thick card. Avery Elle die was the one used to die-cut the bookmarks. Then, I went on stamping the poppies on two of the die-cuts, using Memento Tuxedo Black. On the third one, I stamped Avery Elle’s heart balloon, ‘smile’ sentiment and added some more handwritten words.
Red and lilac twine was added to the bookmarks to give contrast and dimension. The stamps were coloured in using Promarkers and Stabilo fineliners. Handwriting was done with Stabilo fineliners.
Hope you like these too! I’ll be back soon with a new part of the bookmarks series and with some more projects.
Wishing you all the best,
Talida
Photo credits: Cristian Istrate
Recycled Kraft Bookmarks

 Hi, everyone!
Today, I have the second part of the recent bookmarks series. The ones today are using a mix of stamps, brands and a bit of handwriting too.
I have used the bookmarks dies from Avery Elle to die cut out of recycled kraft card in white and brown/natural. Lately, I’ve become a huge fan of this type of card not only for its quality but also for keeping it green.
To embellish them I used some of Avery Elle’s Ellie stamp set – the heart balloon, the tiny flower, the grass and the sentiment ‘smile’. For one of these bookmarks I chose a Gorjuss girl from the mini collectible stamp series – ‘I gave you my heart’, to whom I added a mouth and a nose with a Stabilo fineliner in black. Docrafts Papermania poppy rubber stamp made a perfect fit for another one of the bookmarks. And for the last one in this second part, I went on with stamping the heart balloon and just added some handwritten sentiments.
Colouring was done using Promarkers and for the handwriting I used my Stabilo fineliners. I have also added red twine and some natural hemp twine.
The bookmarks turned out really great and I love it!
Photo credits go to Cristian Istrate.
Wishing you all the best,
Talida
Smile Mini Bookmarks
Good morning, everyone! This is the first part of a new bookmark series I’ve made. These are the tiny ones in round, square, heart shapes with smile, mini hearts and flowers on.
I’ve been pretty busy this year and made lots of projects I am proud of. As always there’s so little time to put all my ideas at work and most of the times, it takes long to get them up on the blog. The whole process from the idea to the blog post is sometimes a 8 hour long work. But fully worth it!
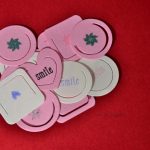 Let’s see what’s with the smile series! The idea of having these mini bookmarks die-cut out of different colour cards has been in my mind for a long time. Probably since I first saw Avery Elle’s Bookmark Die set. So, I die-cut plenty of these bookmarks and then I stamped them using my new mini Distress Ink cubes using flowers, mini hearts and the smile sentiment from an Avery Elle clear stamp set – Ellie.
The beautiful photos were taken by one of my favourite photographers – Cristi Istrate.
Wishing you a lovely day,
Talida
Let’s celebrate
Dear crafty friends, good morning! Let’s celebrate a new day, life and enjoy living it in the present, the best we can!
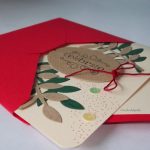
The card I’ll show you today is part of another 5 card set I made and gave to a beyond great person. What made me happy and all teary was the reaction of joy and eagerness to open the envelope box to see what’s inside. It literally filled my eyes with tears!
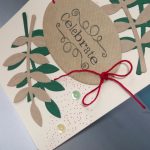
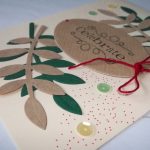
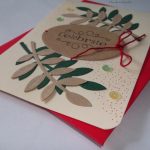
Back to the card, I used cream cardstock for the card base and rounded the bottom corners using my 1-2-3 Punch Board. Then, I die-cut some leaves out of kraft and green cardstock – 2 of each. In my stash, there are many other die cut pieces like the one I used for this card’s centre. This is a kraft card oval frame, die cut using WPlus9′ s Anastasia Tag dies. I stamped ‘celebrate’ as a sentiment onto it using Tsukineko’s Brilliance fast-drying pigment ink in Graphite Black. Next step was to adhere the leaves onto the front card base. In order to give more dimension, I pierced the centre frame on the sides, thread some red twine and tied it in a bow on the right.
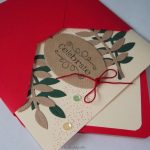 After that, I chose some sequins from Neat&Tangled Spring Mix set (bought from Seven Hills Crafts), 2 of each colour. It looked a bit incomplete, so, I thought adding some tiny dots with my Stabilo fineliner in red would do the trick. And that was all. My card was ready.
Wishing you a lovely day and sending you big hugs,
Talida
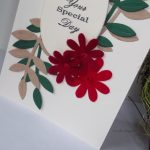
Petals and Leaves for a Special Day
Petals and leaves say good morning to you today!
The handmade card was created for a dear friend of mine to share on March special days. Yet, I am not sure if she’s kept it for herself or not. 🙂 It is one of the 5 card set prepared for her and there was a mini box to accompany it.
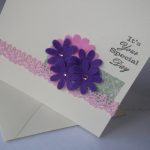
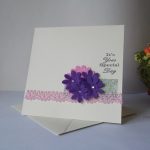
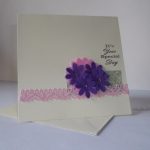
Soft felt flowers card
Good morning! The card I share with you today has some soft felt flowers on it. Also, it is part of a special set of cards I made for a dear friend of mine.
Hoping you’ve started the day with a positive vibe and having planned for a relaxing weekend, feel free to have a read at the short story of this handmade card.
So, I thought I give it a try and see if using a different material, other than paper on the card would give it dimension and a bit of a sophisticate look.
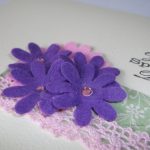
As I had die cut a lot of felt flowers and petals for the flower brooches project, it’s been easy to choose some soft violet felt flowers to use on the front cover of this card. You can see that I actually CASEd the card I made last year for Women’s Day.
Now, what’s different? The adhesive crochet border lace is Papermania Capsule Collection in Wild Rose not French Lavender; the felt flowers are adhered on a bigger pink soft flower as a base; the card is cream and patterned; the sentiment stayed the same as for the previous card, the flowers’ central disks are actually adhesive stones in pale lilac and not white adhesive pearls. Hope you like this approach too.
Wishing you a lovely day and a great weekend,
Talida
Some more freesia flowers
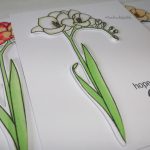
Hello, again, dear friends! Would you like some more freesia flowers love? I, for sure, would like more! As I love colouring a lot, I decided to stretch the stamp and die set a bit more and go try some different colours for the freesias. These are really beautiful and lovely perfumed spring flowers.
Flower Brooches and Mini Boxes
Hi, dear friends and crafters! This is going to be a short post about the flower brooches and mini boxes I made for the 1st of March. In a previous post, I mentioned that I made a lot of trinkets (M?r?i?oare) to give with this occasion.
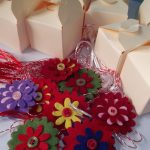
As I love to overcome myself and find different ways to present my crafts, I chose to wrap the flower brooches in mini boxes. Here, the main and very useful tool is my 1-2-3 Punch Board from We R Memory Keepers. I’ve made a lot of boxes of various sizes and I can say that I am so happy I’ve got this amazing tool. 🙂 Also, this tool is excellent for making envelopes and ribbons.
The flower brooches are made of soft coloured felt, which I die cut using the Xcut Mini Flower die set and my Xcut machine. The boxes are made of 220 gr thick cream cardstock. The special twine made of red and white silk thread was bought from a local craft shop.
Hope you’ll enjoy seeing them and many thanks for stopping by.
Wishing you all the best,
Talida


